- The motherboard's power solution (VRM, phases and heat dissipation) determines the stability and actual capacity of your CPU.
- ATX, EPS, PCIe, Molex, and SATA connectors must be used correctly to avoid failures, crashes, and damage to the motherboard.
- A well-sized, high-quality power supply unit (PSU) protected against power surges extends the life of the motherboard and the rest of the components.
- Cleanliness, good ventilation, and temperature control are key to maintaining a healthy food system.
When you build a PC or choose a new motherboard, almost everyone focuses on the CPU, RAM, or graphics card, but very few people pay attention to what keeps all of that alive: the motherboard's power solutions and the power supply that feeds them . And yet, how that power is managed determines whether the system is stable, lasts for years, and doesn't give you surprises like shutdowns or blue screens of death.
Throughout this guide, we will calmly but directly explain how power is distributed and regulated on a motherboard, what types of connectors are involved, what the VRM actually does , how the needs change in normal PCs, gaming PCs, or mining rigs, what symptoms betray a failing power supply, and what you can do to prevent it from leaving you stranded at the worst possible moment.
What exactly is a motherboard's power solution?
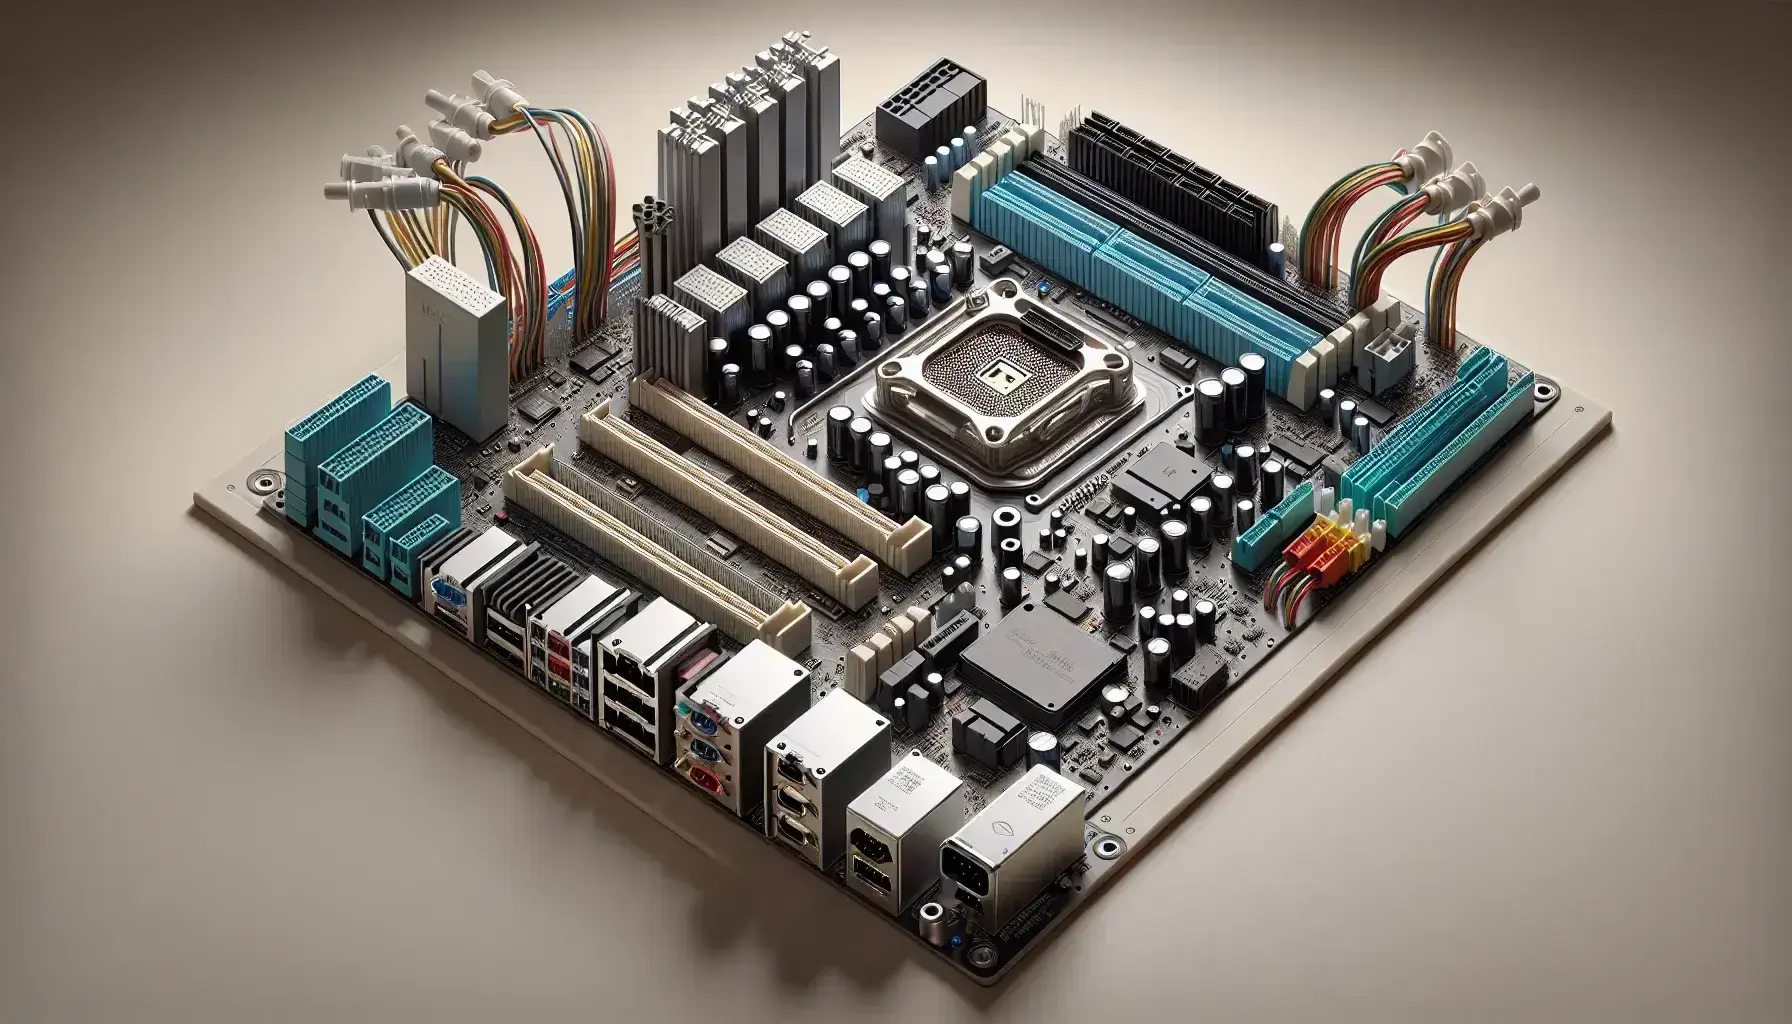
When we talk about the motherboard's power solution, we're not just referring to the large 24-pin connector, but to the entire set of components responsible for receiving power from the PSU, transforming it, and distributing it to the CPU, chipset, PCIe slots, memory, and the rest of the circuitry.
At the heart of it all are the VRMs (Voltage Regulator Modules) , which take the 12V (and other lines) from the power supply and convert them into much lower and more stable voltages for the processor and other sensitive components. This conversion is not trivial: it involves high-frequency switching, precise control, and good heat dissipation.
The power solution includes, among other key elements, the ATX/EPS input connectors, the power phases with MOSFETs, chokes (inductors) and capacitors, and the cooling system (heatsinks and sometimes heatpipes) that prevents everything from turning into a toaster when the CPU is under load.
Each motherboard combines these blocks differently, which is why a cheap motherboard might struggle with a demanding processor, while a high-end model can handle aggressive overclocks or sustained loads for hours without breaking a sweat.
VRM, power phases and their impact on performance
The VRM is essentially a step-down converter that reduces the voltage from +5V or +12V to the few volts (1.x V or even less) needed by the CPU or memory . It does this through several stages of switching and filtering so that the processor receives a clean and stable voltage, without dangerous spikes or drops.
This VRM is divided into power phases . Each phase, in simplified terms, consists of a set of MOSFETs, an inductor, and capacitors. Instead of a single phase working at its limit, several phases share the load: they alternate delivering current to the processor , which reduces stress on each phase and improves efficiency.
The more high-quality power phases the VRM has dedicated to the VCORE (the CPU core power supply), the cooler and more stable the system will run . An overloaded phase overheats, loses efficiency, and can become a source of instability, especially when the processor enters turbo mode or you're overclocking.
High-end motherboards feature extreme designs, with configurations like 24+1+2 phases and 90-110A stages to power enthusiast-level CPUs. This is ideal if you're going to push a processor like a top-of-the-line Core i9 or a Ryzen 9 to its maximum frequency and voltage. However, using that type of motherboard with a modest CPU is a bit like using a heavy-duty truck to take the kids to school: it might work, but you're nowhere near using its full potential.
Motherboard and power supply connectors
For the VRM to have something to regulate, it first needs power from the PSU . This involves several standard connectors that you should be familiar with, both on the motherboard and the power supply itself.
24-pin ATX Main Connector
This is the classic large connector that's usually located on the right side of the motherboard. The main 24-pin ATX connector powers most of the motherboard's logic : chipset, PCIe slots (to a certain extent), SATA ports, USB ports, and other auxiliary circuitry.
This block carries the +3,3V, +5V, and +12V lines, as well as the grounds, power signals, and power management signals between the motherboard and the power supply. Although its original intention was to be the only connector needed for the entire system , the dramatic increase in CPU power consumption necessitated the addition of extra dedicated connectors.
4-pin and 8-pin EPS/CPU connectors
Near the processor socket, you'll find one or more 4, 8, or even 8+8 pin connectors. These are called EPS12V or CPU power connectors , dedicated almost exclusively to supplying 12V to the CPU's VRM.
A 4-pin connector can supply around 155W to the CPU , enough for many mid-range processors working at stock frequencies, although a bit tight if you want to do serious overclocking.
The 8-pin power connector, which is simply two 4-pin connectors combined, can handle around 235W . That's why modern motherboards for powerful CPUs include at least one 8-pin EPS connector and sometimes a second 8-pin connector or 8+4 combinations to provide even more headroom.
In many designs, if the motherboard includes two 8-pin connectors, it is not always mandatory to plug both in for it to work , but if you are going to push an HEDT CPU, a Core i9 or a Ryzen 9 with overclocking, it is highly recommended to use all the EPS connectors that the motherboard offers.
PCIe power connectors for graphics cards and the motherboard itself
The 6-pin and 8-pin PCIe cables coming from the power supply are primarily intended to power dedicated graphics cards or other high-power PCIe devices . Although they may physically resemble EPS cables, they are not interchangeable: the pinout is different, and you should never use a PCIe cable in a CPU connector or vice versa.
Some motherboards, especially those with many PCIe slots or designed for mining, include additional PCIe or Molex connectors on the PCB itself to boost power to the slots . Their function is to supplement the 75W that each PCIe slot can theoretically supply from the 24-pin connector.
Additional Molex and SATA power connectors
Although in modern PCs they are primarily used for hard drives, pumps, or accessories, 4-pin Molex and SATA power connectors can also appear on the motherboard as auxiliary power input points. In mining motherboards or models with many PCIe slots, they are used to power part of the bus without overloading the main ATX connector.
Non-ATX power solutions (12V-only and new standards)
In recent years, alternative standards to the classic 24-pin ATX connector have emerged, such as ATX12VO or 10-pin connectors centered on the 12V rail . The idea is to simplify power supply design, reduce connector size, and improve efficiency by allowing the motherboard to locally generate the 5V and 3,3V from the 12V supply.
These types of solutions are still in the minority in terms of consumption, but they make it clear where the industry is headed: more conversion on the motherboard, less complexity in the PSU, and a total focus on the 12V line , which is what high-performance CPUs and GPUs actually use.
How to choose a motherboard based on your power solution
To avoid overdoing it or falling short, the first thing to consider is how you're going to use the PC. An office computer doesn't need the same resources as a PC for 3D editing or a mining rig with multiple GPUs.
If your priority is heavy productivity (video editing, rendering, large builds), CPUs often spend long periods near their power consumption limits. In these cases, investing in a motherboard with a robust VRM, multiple power phases, and good heatsinks makes perfect sense , because long-term stability under load will matter more than any aesthetic frills.
In gaming, the stress is distributed more across the GPU than the CPU, although modern games with ray tracing and complex physics also put a strain on the processor. A good VRM helps maintain high and stable clock speeds when the game places peak loads on both the CPU and GPU simultaneously.
A good rule of thumb, if you're unsure, is to balance your investment between CPU and motherboard : if you buy a high-end CPU, don't pair it with the cheapest motherboard you can find; and if your CPU is entry-level, don't spend twice as much on an enthusiast motherboard. A practical tip: aim to spend a similar amount on CPU and motherboard for well-balanced systems.
On AMD platforms, for example, it makes perfect sense to pair a Ryzen 9 with top-of-the-line X870E motherboards , a Ryzen 7 with decent X870E or B850 motherboards, and a Ryzen 5 with a good-quality B850 motherboard. On Intel, Z890 motherboards are the natural match for unlocked Core Ultra 7 and 9 processors, while B860 is a better fit for more budget-friendly models.
Special motherboards for mining and 24/7 loads
In mining (whether cryptocurrencies like Radiant or EthereumPOW, or data mining), the story changes considerably. A mining rig operates for many hours at 100% load , with multiple graphics cards each consuming hundreds of watts. This puts a significant strain on the overall system power supply.
Mining motherboards typically come with a good number of PCIe slots (often x1) and extra power connectors for those slots : Molex, 6-pin PCIe, and similar connectors scattered across the PCB. You don't necessarily need to connect absolutely all of them, but you should connect as many as you need depending on the number of GPUs and the manufacturer's recommended layout.
In these types of setups, it's critical that the power supply has sufficient 12V rails, dedicated PCIe cables, and ample power headroom . Power instabilities here not only crash the system but can also lead to data loss, rejected shares, or, in the long run, premature hardware failure.
Correct connection of the power cables to the board
Although it may seem like a simple procedure, connecting the power supply correctly is vital. A cable in the wrong place, forced, or only partially connected can prevent the computer from starting up, cause instability, or, in the worst case, damage the motherboard.
Basic steps to power the motherboard
Order isn't sacred, but following a process helps you not to forget anything:
- Connect the 24-pin ATX on the side of the board. Look at the plastic tab: it must fit with the connector's hook on the PCB. If you have a 20+4 cable, make sure the 4 extra pins are securely connected and locked in place.
- Connect the CPU EPS cable (4, 8 or 8+8 pin) on the top of the motherboard, next to the socket. Again, the retention tab should click. Avoid confusing this cable with a PCIe cable: carefully check the markings on the power supply.
- Powering the graphics cards via their 6- or 8-pin PCIe connectors. Never assume that the motherboard's PCIe slot is sufficient: modern GPUs almost always require direct power from the power supply.
- If your license plate indicates it, connect auxiliary Molex, SATA or PCIe connectors directly to the PCB to reinforce the power supply to PCIe slots, especially on mining motherboards.
If your motherboard has two 8-pin EPS connectors and your power supply only has one, don't try to improvise with makeshift adapters or by reusing PCIe cables . At best, you'll experience performance limitations; at worst, instability or the inability to boot. In these cases, the sensible solution is to consider a more suitable PSU.
Compatibility between 4 and 8 pin connectors
Many power supplies come with 4+4 pin CPU cables: you can use only one half on motherboards that support a 4-pin connector , and both on motherboards with an 8-pin connector. Conversely, some motherboards with an 8-pin connector can boot with only 4 pins, provided the CPU is not too power-hungry, but this is not ideal for demanding systems.
What you should never do is force an 8-pin GPU (PCIe) cable into the motherboard's EPS connector , nor should you mix and match modular cables from different sources. Externally they may look the same, but the internal pinout changes, and you could fry the motherboard in seconds.
Other motherboard connectors related to power
Beyond the main protagonists (ATX, EPS and PCIe), the motherboard is full of connectors that participate, in one way or another, in the management of power and stability of the system.
Fan and pump connectors
Scattered across the motherboard you'll see 3-pin and 4-pin fan connectors. The most critical is CPU_FAN, which must always be connected for the motherboard to boot ; it's often accompanied by an optional CPU_OPT connector for the CPU cooler's second fan.
The SYS_FAN or CHA_FAN connectors are for case fans, while more modern motherboards include specific headers for liquid cooling pumps (PUMP, AIO_PUMP or W_PUMP) , designed for higher loads and finer control.
A 3-pin fan in a 4-pin connector works fine, it just won't take advantage of PWM control. Physical compatibility is very well thought out , so problems usually arise more from excessive current draw (too many fans on a single header without a suitable hub) than from design issues.
Lighting connectors and accessories
The lighting is also powered from the circuit board . There are two main types of headers for LED strips and devices:
- 4-pin RGB connectors (12V)These allow for a common color across the entire strip and simple effects. They are not compatible with addressable ARGB devices.
- 3-pin ARGB connectors (5V)These add data lines and allow you to control each LED independently, with more elaborate effects. These are the ones you'll see on modern gaming motherboards.
In addition to these, some brands integrate proprietary connectors for specific accessories , expansion modules, or internal ports such as Thunderbolt, always powered from the motherboard itself.
Power control connectors and front panel
Don't forget the small pins where the power button, reset button, and front panel LEDs are connected. This block, often labeled F_PANEL or PANEL1 , includes the signals that tell the motherboard and power supply to turn on, turn off, or reset.
In the same area, you'll usually find the pins for the internal speaker (buzzer) , which emits the typical error beeps at startup, and headers for temperature probes, water flow sensors, or voltage measurement, which are highly valued in advanced RL setups.
Other key components of the board and their relationship to power
The other components of a motherboard depend, directly or indirectly, on how the system is powered . Understanding these components helps to grasp the complete picture.
The CPU socket (LGA, PGA, or BGA) receives regulated power from the VRM. In modern designs, parts of the old Northbridge (memory controller, main PCIe) have been integrated into the CPU itself, shifting some of the power complexity to the processor and its associated VRM.
The RAM slots (DDR4, DDR5, etc.) receive their voltage through specific regulators, often integrated into the memory itself (in the case of DDR5) or on the motherboard, and their stability also depends on the quality of the secondary VRMs and the filtering.
The various expansion buses (PCI, PCIe), chipsets, and controllers (SATA, USB, M.2) share power lines from the ATX connector and auxiliary regulators. Although they consume much less power than the CPU or GPU, inadequate power supply to these areas can cause disk disconnections, data errors, or random system crashes.
The BIOS/UEFI and the CMOS memory , powered by the motherboard's battery, store configuration and boot parameters, including voltage settings. If the power fails or the battery dies, the motherboard may lose these settings and behave erratically until you restore them.
How to detect a faulty power supply or energy solution
Although a power supply's failure sometimes comes with a dramatic spark and burnt smell, most power supply problems manifest themselves earlier through more subtle symptoms . It's helpful to be aware of these so you don't blame the wrong component.
The device does not turn on at all
If pressing the power button doesn't produce any LEDs or even a fan spin, there are several possibilities: a broken button, a dead motherboard, or a completely failed power supply . Before assuming the power supply is dead, it's worth shorting the button pins on the motherboard (with a screwdriver, for example) to rule out a problem with the power switch on the case.
If there's still no power, even with the power supply switch ON and the cable properly plugged into the wall, the PSU has most likely given out. In this scenario, there's no point in trying to fix it any further ; it's time to think about replacing it.
Random shutdowns or restarts
A classic scenario: you're peacefully playing a game or rendering, and suddenly your PC shuts down or restarts without warning. This can be due to overheating of the CPU or GPU , a faulty connection on the graphics card, or, very often, a power supply that can no longer maintain the required power under load.
When the PSU's internal protection systems detect a problem (overvoltage, overcurrent, etc.), they can trigger a preventative shutdown to avoid further damage . If this happens repeatedly when the equipment is under load, start by checking temperatures, and if those are normal, suspect the power supply.
Blue screens, game crashes, and graphical errors
A lack of clean and stable power can cause BSODs (blue screens of death), spontaneous crashes of games or demanding applications , especially when the GPU and CPU are under heavy load simultaneously. Often, users rush to format their hard drives or blame the video drivers, but an unstable 12V power rail has the same effect.
If problems persist after a clean operating system installation, and temperatures are normal, the power supply unit (PSU) and graphics card should be considered prime suspects. Testing the GPU in another computer or using a known good power supply is the quickest way to determine the cause.
Strange noises from the power supply fan
If your PSU fan starts squealing, scraping, or making metallic noises, it usually means the bearings are worn or dirt is blocking its rotation. A stopped fan in a power supply can trigger serious overheating , so don't ignore it.
Sometimes a good cleaning with compressed air and a little TLC solves the problem. If the noise persists, the safest solution is to replace the fan or even the power supply , especially if it's a few years old.
Burnt smell, smoke, or swollen capacitors
When there is a clear burning smell, a sudden "pop", smoke coming from the PSU or, upon opening it (if you know what you are doing), swollen capacitors or with dried electrolyte residue , the diagnosis is immediate: that power supply is finished.
Continuing to use it is an unnecessary risk. Even if the computer appears to start, a power supply in that state can damage other components . From this point on, the only sensible option is replacement, and while you're at it, check the electrical wiring and surge protection.
How to extend the life of the power supply and the power solution
There's no magic trick to guarantee a power supply will last forever, but there are practices that greatly reduce the likelihood of premature failure and help the motherboard and its VRMs work in optimal conditions.
Properly size the PSU's power
One of the most common mistakes is choosing the minimum power supply recommended for the GPU or CPU. If a graphics card requires a 450W PSU, installing a 500W one isn't exactly generous: you'll frequently have it near its limit , increasing noise, temperature, and wear.
The best approach is to leave a reasonable margin above the system's maximum expected power consumption (30-40% is usually a good guideline), so that the power supply operates at peak efficiency without strain . It's better to err on the side of caution than to fall short.
Avoid low-quality OEM sources
Generic power supplies without a clear brand, typical of cheap pre-built PCs, usually cut corners on components, protections, and build quality. Cheap power supplies almost always end up being expensive , because when they fail, they not only take the power supply itself with them, but can also damage the motherboard, GPU, or storage.
It's preferable to invest in well-known brands with reputable certifications and, above all, good technical reviews , even if they don't have the most eye-catching efficiency label. Many reputable manufacturers offer 7, 8, or 10-year warranties, a good indicator that they have confidence in their designs.
Protect yourself from power surges with a suitable UPS
If you live in an area with frequent power outages, storms, or faulty electrical wiring, an in-line UPS is practically essential. It not only gives you time to calmly shut down your PC, but it also helps filter out voltage spikes and dips that, in the long run, can severely damage power supplies.
This protection benefits both the PSU and the rest of the equipment, because it prevents sudden shutdowns that can corrupt data , damage disks, or leave the operating system in an unstable state.
Keep the fountain clean and well ventilated
Dust is one of the biggest enemies of electronics. Accumulating dirt on grilles and fans increases the internal temperature of the power supply , which accelerates the aging of capacitors and other components.
It's a good idea to occasionally take the PC out and give it a quick clean with compressed air, paying attention to the PSU's air intake. Ideally, the case should have dust filters in the power supply area, and the power supply should be able to draw in fresh air (for example, from the bottom of the tower, if it's properly raised off the floor).
Maintain the overall temperature of the system
The cooler the system runs, the better the power supply, VRM, and the rest of the motherboard will perform. Don't place the case right up against a wall, blocking air vents, or in enclosed spaces without ventilation. Plan for consistent airflow within the case , with clearly defined intakes and exhausts.
If you're using very powerful CPUs or GPUs, seriously consider decent cooling (mid-to-high-end air cooling or an all-in-one liquid cooler) and monitor temperatures with monitoring software . Power supplies suffer much less when they're not constantly operating at their thermal limits.
Understanding how a motherboard is powered, the role of the VRM and its phases, the connectors involved, and how to identify a faulty PSU gives you a significant advantage when building, maintaining, or upgrading your PC. Choosing a sensible combination of CPU, motherboard, and power supply, properly sizing the wattage, ensuring adequate airflow, and protecting yourself from power surges will result in a much more stable, durable system that's less prone to unexpected failures , whether you're gaming, working long hours, or running a mining rig 24/7.